Recent Posts
Archives
Unlocking Efficiency: How to Create CI/CD in AWS Like a Pro
Introduction:
Are you ready to become a pro in crafting CI/CD pipelines on AWS? By the end of this post, you’ll have the expertise to build and optimize your CI/CD workflow using three essential AWS services: CodeCommit, CodeBuild, and CodePipeline.
Understanding the Basics: As we embark on this journey, let’s demystify the fundamental components.
CodeCommit:
- What is it? CodeCommit is a version control service hosted by Amazon Web Services that you can use to privately store and manage assets in the cloud. For more details: AWS CodeCommit
CodeBuild:
- What is it? CodeBuild is a fully managed continuous integration service that compiles source code, runs tests, and produces software packages that are ready to deploy. For more details: AWS CodeBuild
CodePipeline:
- What is it? CodePipeline is a continuous delivery service you can use to model, visualize, and automate the steps required to release your software. For more details: AWS CodePipeline
Let’s Dive In:
Now that we’ve introduced the key players, let’s delve into each service’s setup, configuration, and best practices for optimizing your CI/CD workflow on AWS.
1. CodeCommit Mastery:
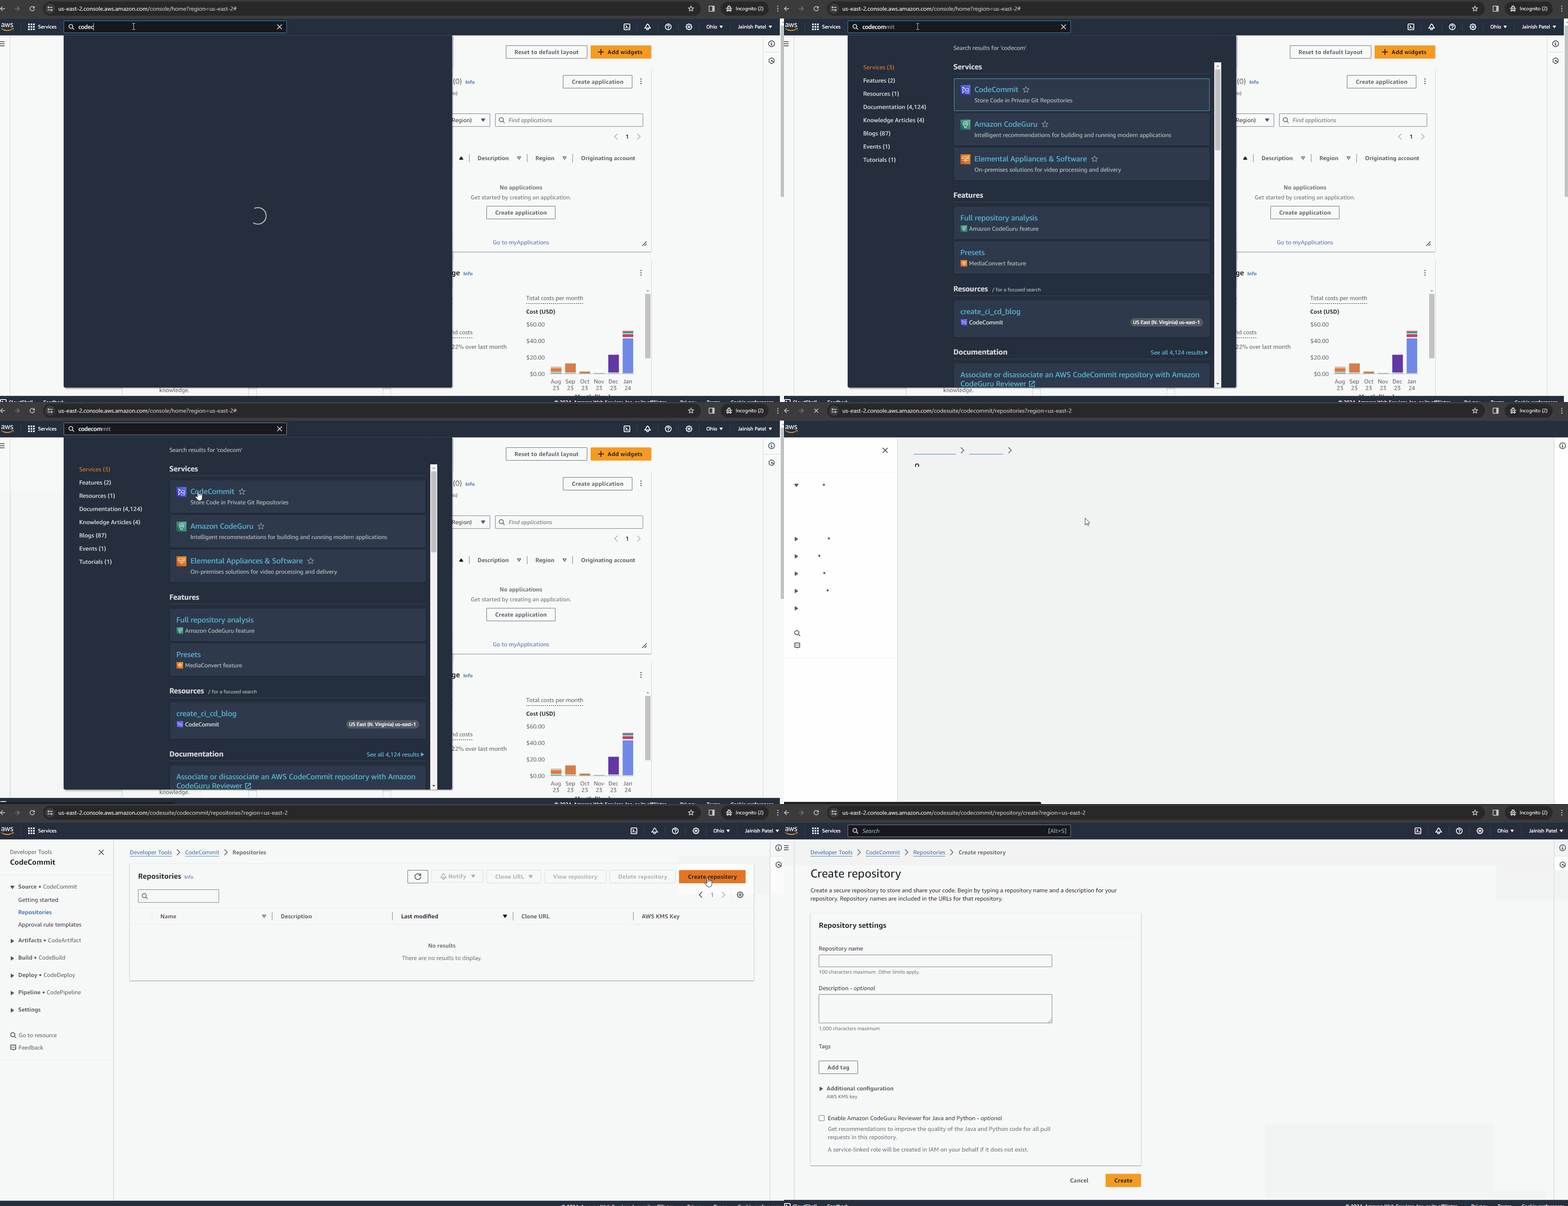
Step 1: Navigate to the AWS CodeCommit service in the AWS Management Console, and initiate the repository creation process by selecting “Create repository”.
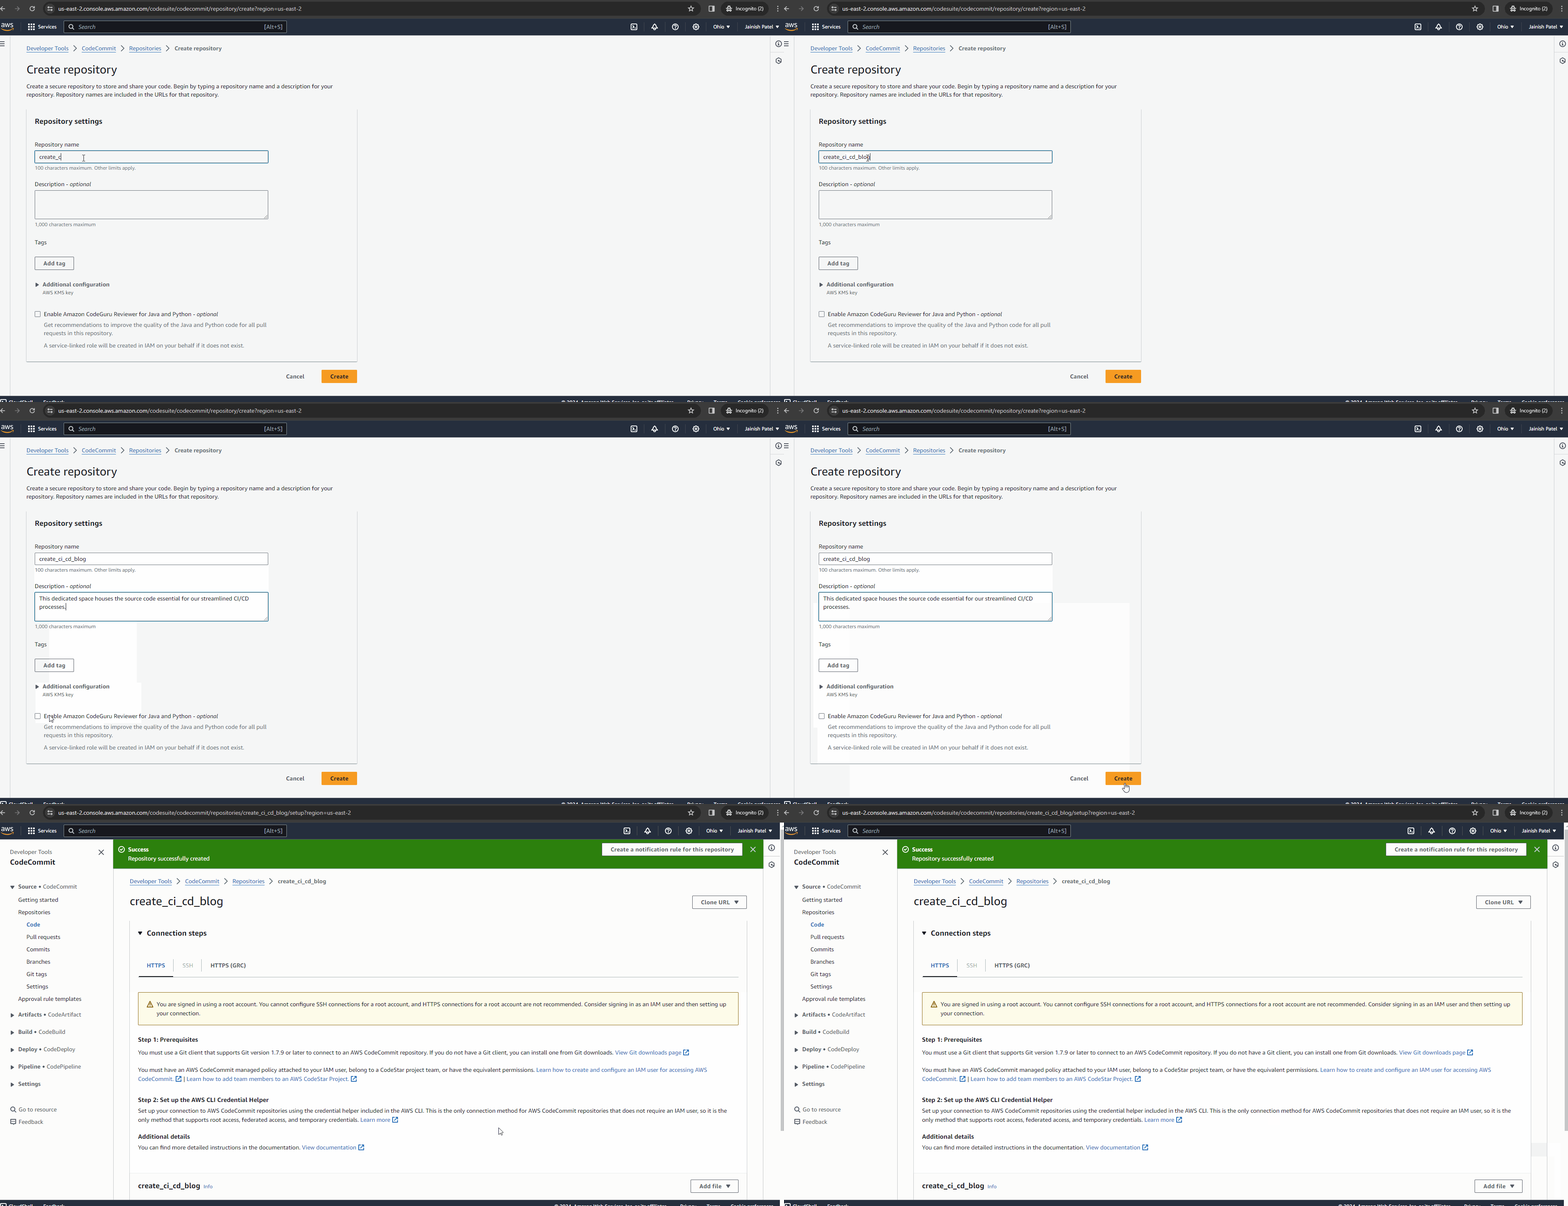
Step 2: Enter a suitable repository name along with an optional description, then click on the “Create” button, following the example illustrated below.
Tips: Ensure that the repository name doesn’t include any spaces. Additionally, consider enabling Amazon CodeGuru for repositories storing Java or Python code. This feature automatically scans your code, offering suggestions based on coding standards. Be mindful that this may incur associated costs.
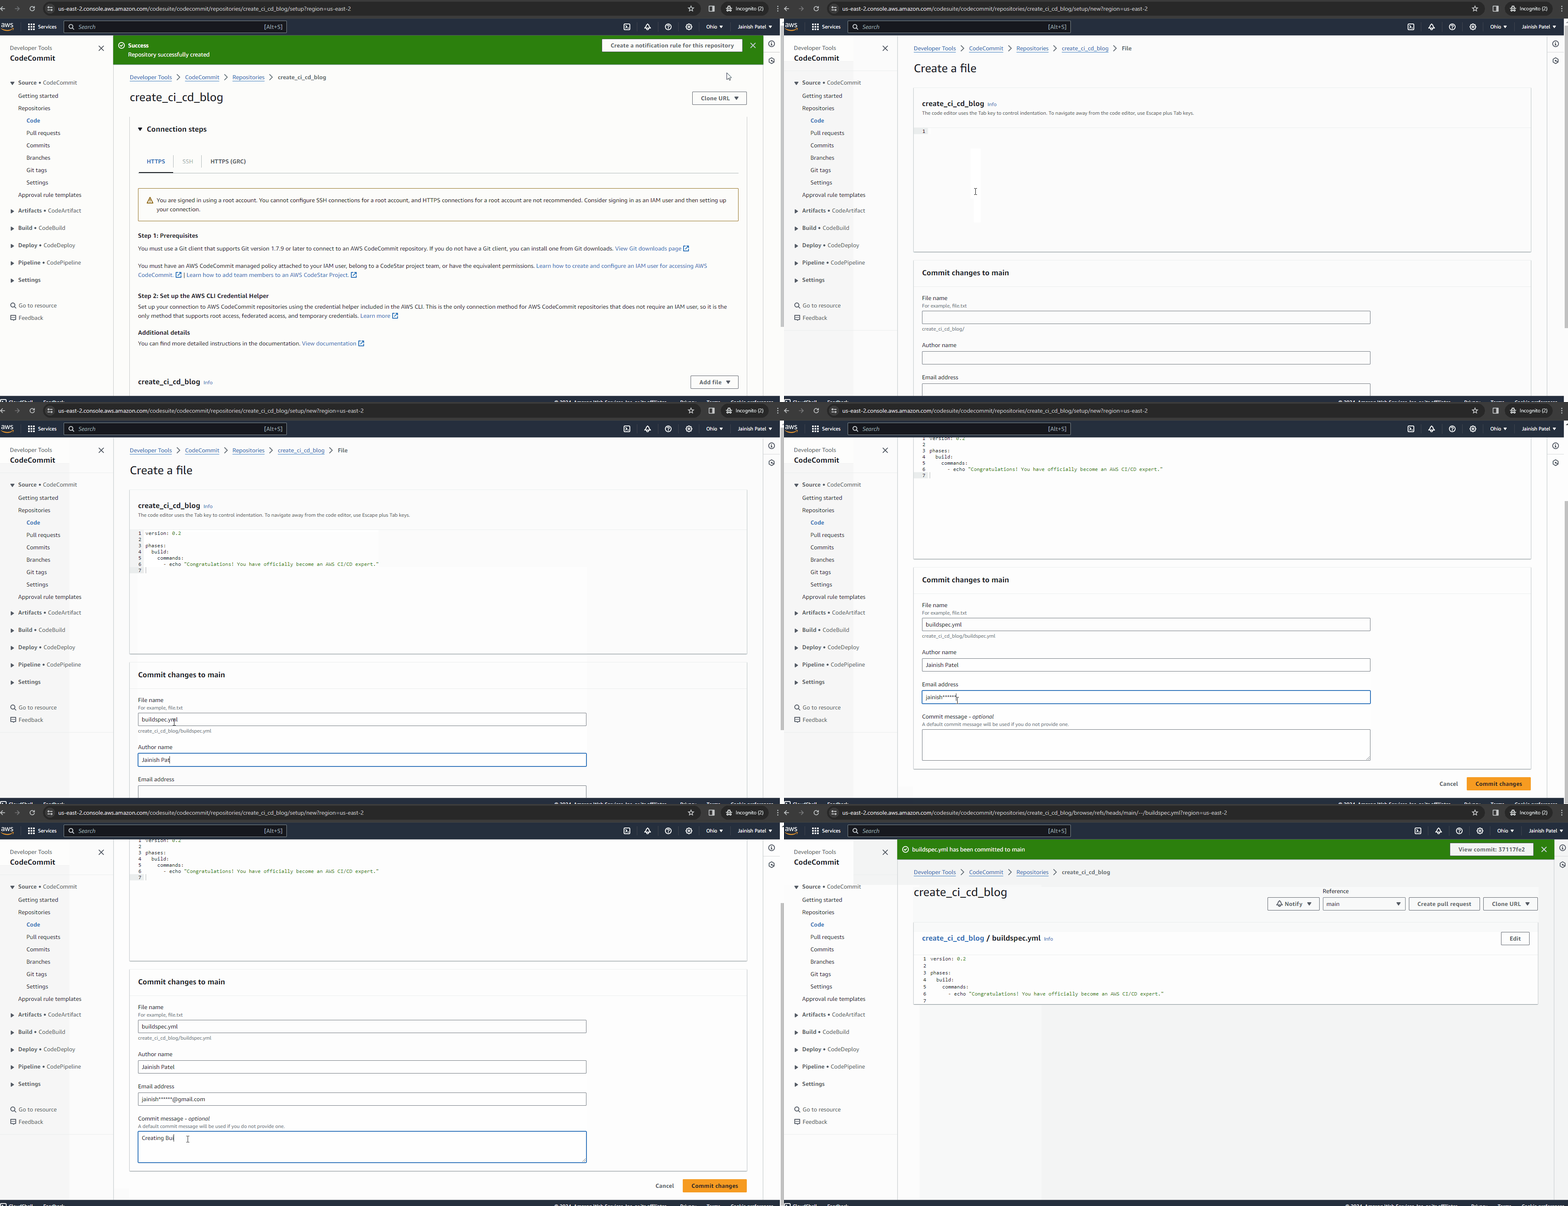
Step 3: Select the “Create file” button, proceed to replicate the provided code from the example images below, complete all mandatory text boxes, and finalize the process by clicking the “Commit changes” button.
Note: While the commit message is optional, providing a description is advisable for better identification of the changes incorporated in this commit.
version: 0.2

phases:
  build:
    commands:
      - echo "Congratulations! You have officially become an AWS CI/CD expert."
2. CodeBuild Excellence
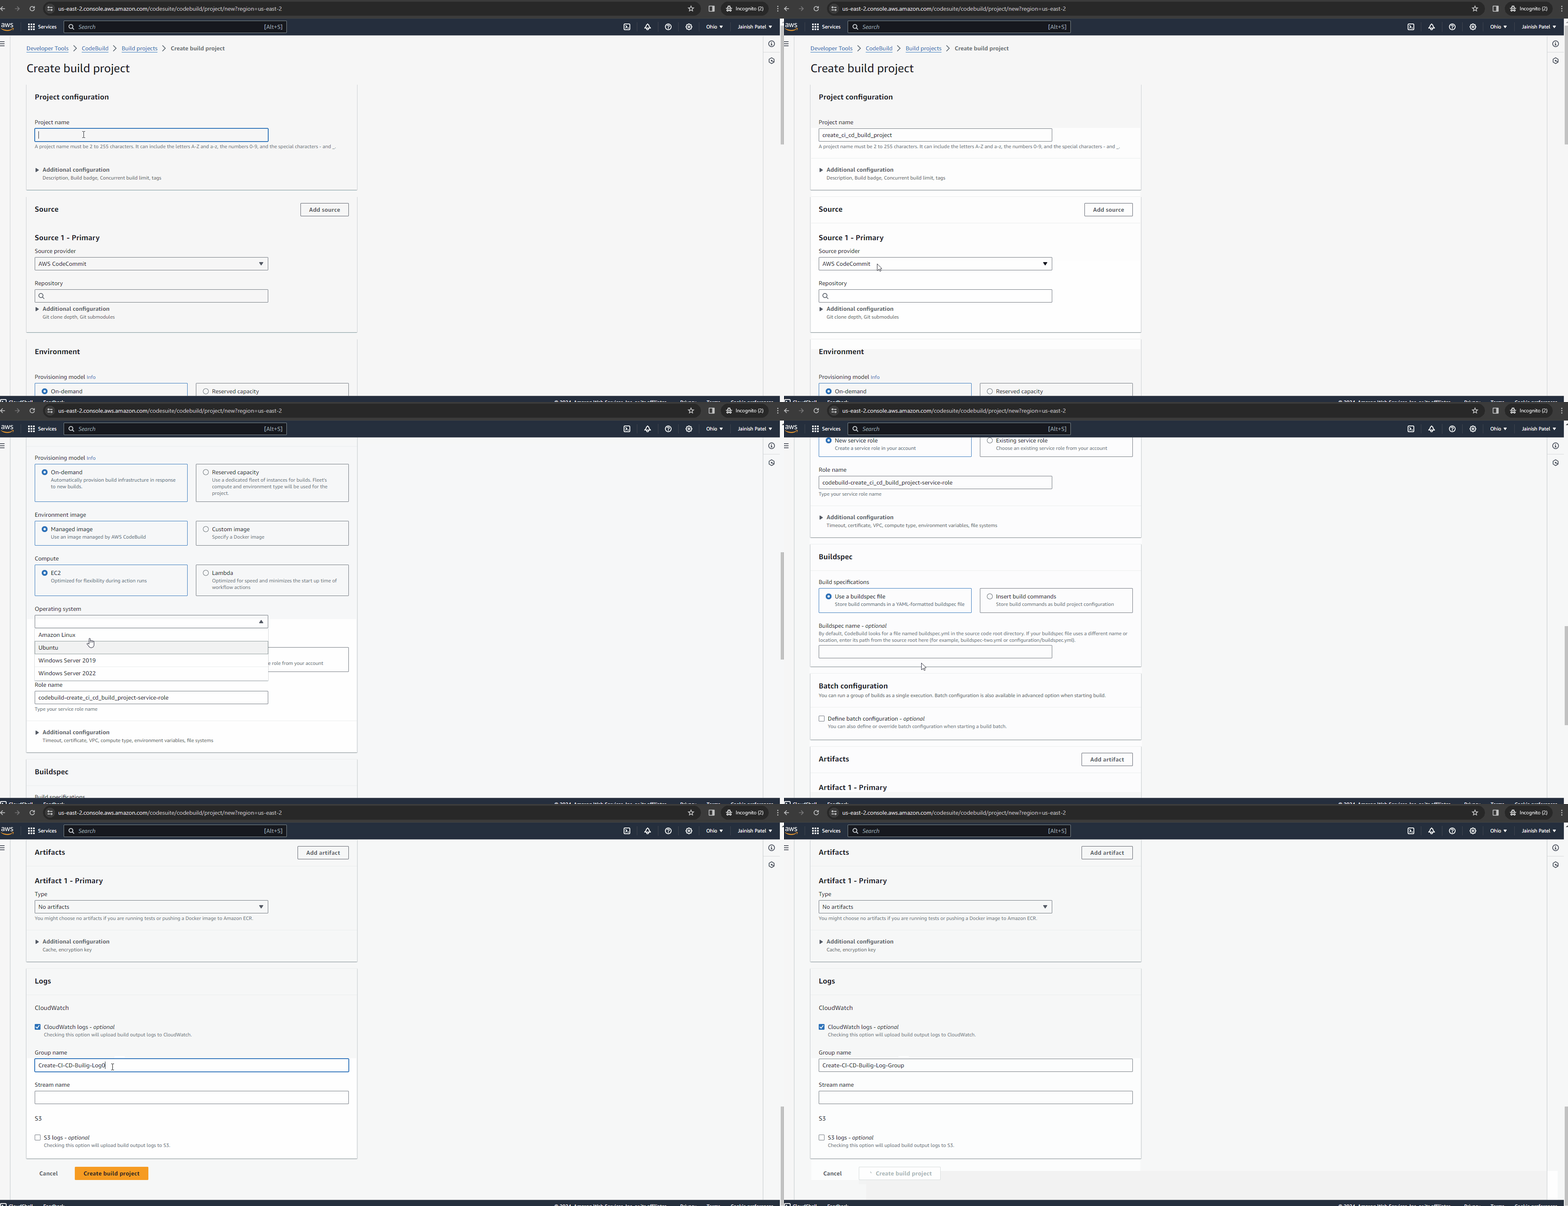
Step 1: Navigate to the AWS CodeBuild service in the AWS Management Console, and initiate the project creation process by selecting “Create build project”.
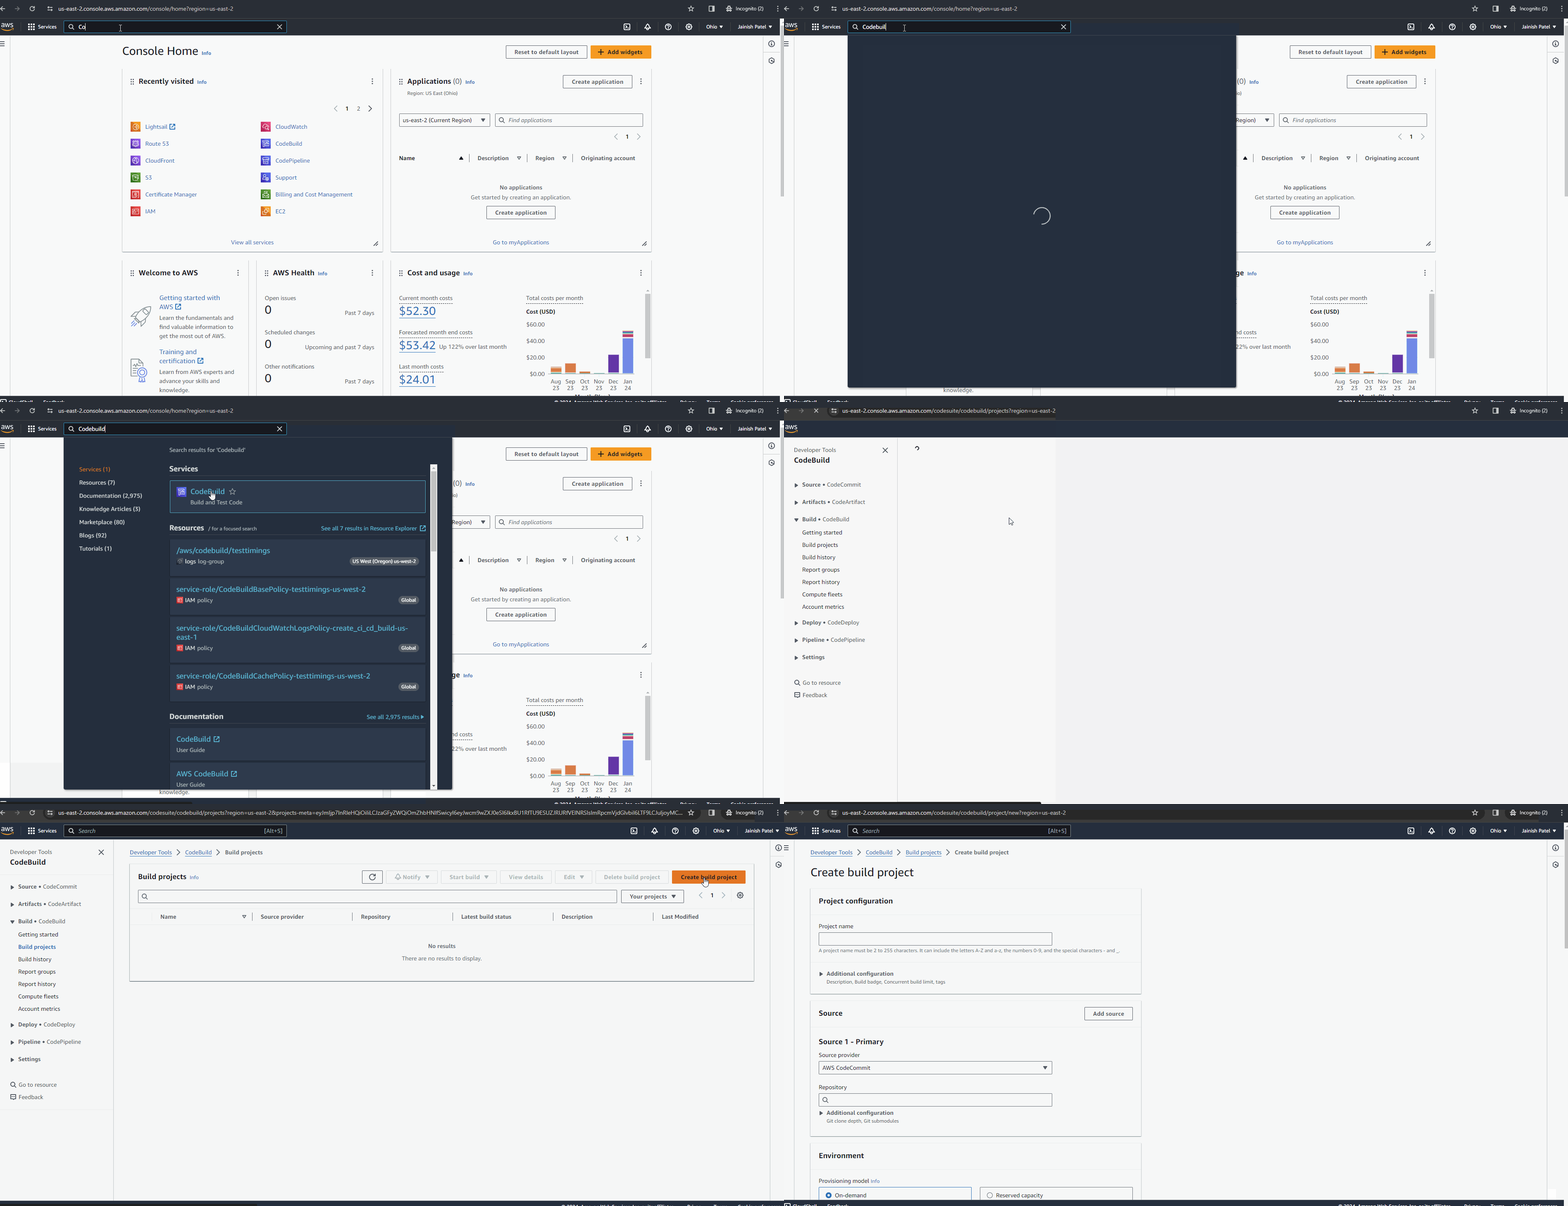
Step 2: Follow these detailed steps to configure your build project:
Give your build project a clear and distinctive name, optionally adding a description for better understanding.
Choose your preferred source provider (AWS CodeCommit, GitHub, Bitbucket) and configure details like the repository and branch, as illustrated below.
Specify the runtime environment, including the operating system, runtime version, and compute resources. Optionally, customize settings such as environment variables, VPC, and certificates.
Define your build process using a buildspec.yml file, detailing build steps, commands, and artifacts.
Note: If your buildspec.yml file is in the source root folder, there’s no need to mention it in the “Buildspec Name” field.Opt for either CloudWatch logs or S3 to store CodeBuild logs.
Tip: CloudWatch provides a user-friendly log storage solution, while S3 is a cost-effective option. However, with S3, you’ll need to download logs locally or use tools like Athena for analysis.Click the “Create build project” button to finalize and complete the project creation process.
3. CodePipeline Unleashed:
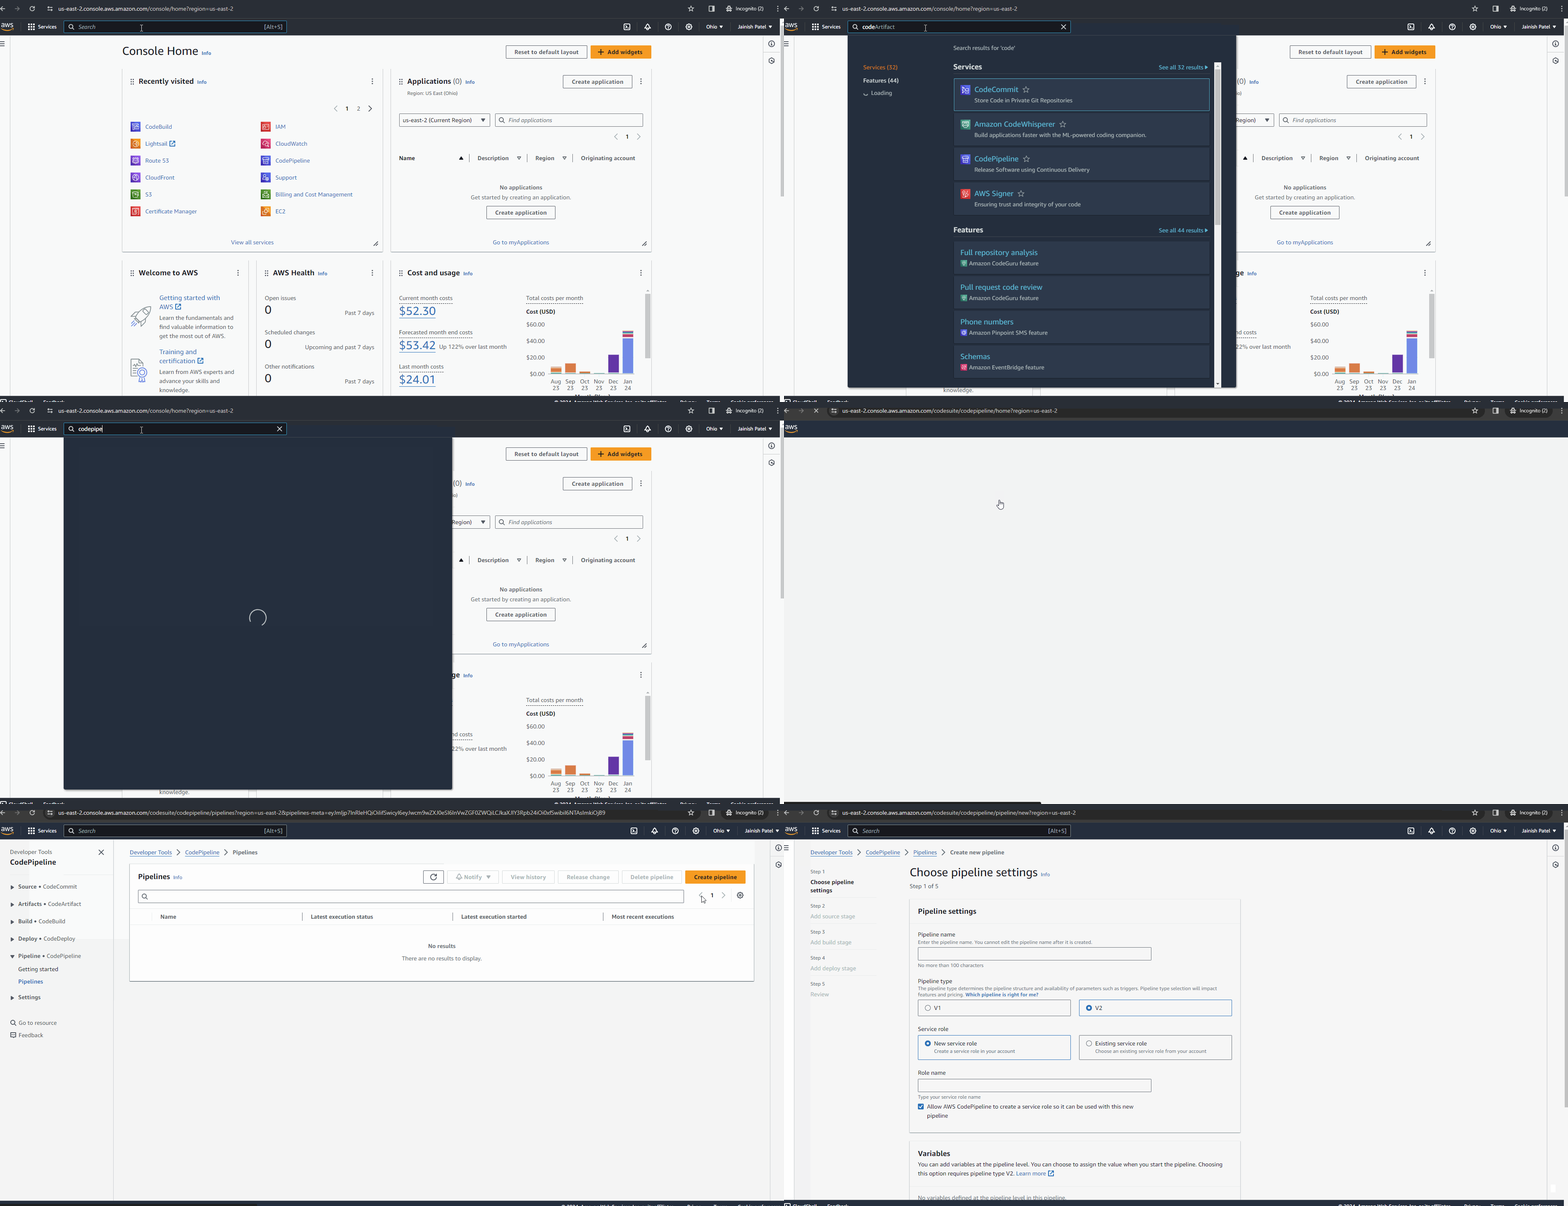
Step 1: Navigate to the AWS CodePipeline service in the AWS Management Console, and initiate the creation of a CI/CD pipeline by selecting “Create pipeline”.
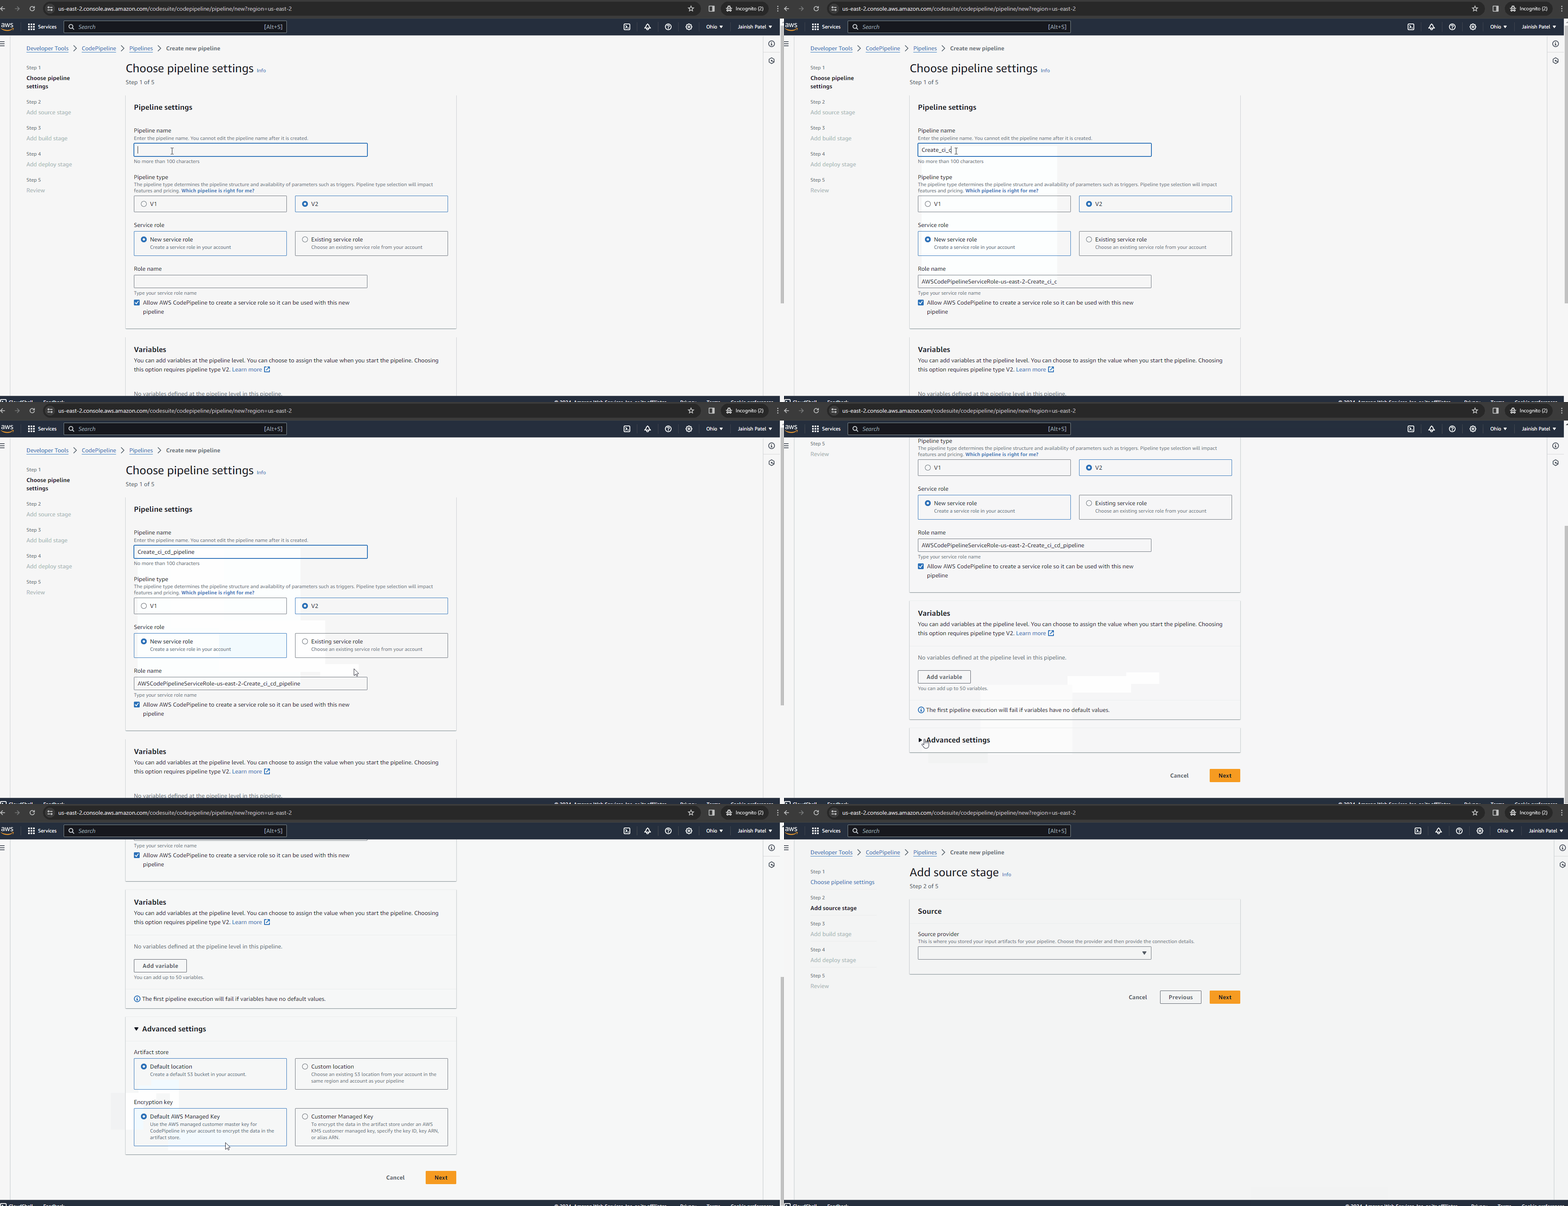
Step 2:Choose a distinct and meaningful name for your pipeline. Additionally, opt to either select an existing IAM Service role for your CodePipeline or create a new IAM Service Role for its operation. Once all configurations are in place, proceed to the next step by clicking “Next.”
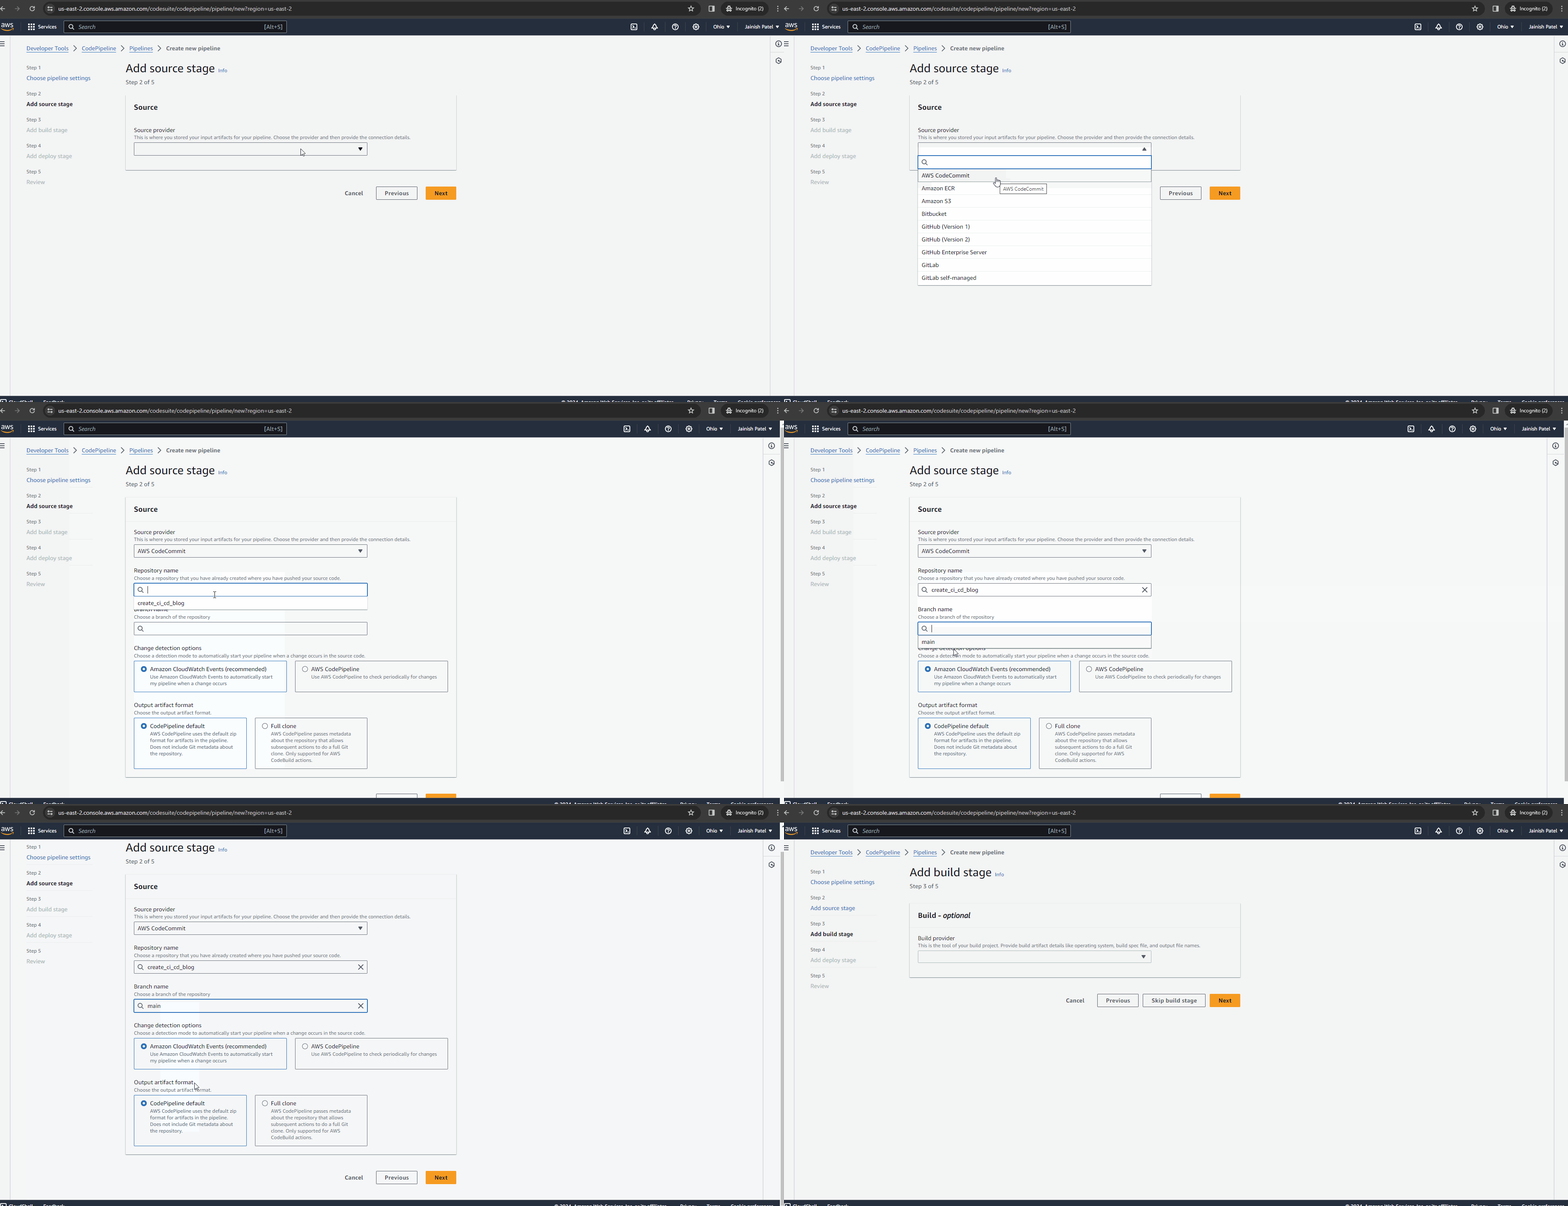
Step 3: Opt for “AWS CodeCommit” as the source provider. Pick the repository you intend to utilize as the source, and specify the branch to monitor for changes. Note that various source providers are available, but for our use case, we are specifically choosing AWS CodeCommit. Once all configurations are in place, proceed to the next step by clicking “Next.”
Step 4: Opt for “AWS CodeBuild” as your build provider in the “Build” stage. While you have the option to create a new Build Project at this point, we’ve already established a build project beforehand, which we’ll employ here. Choose the previously created CodeBuild project. If desired, you can customize additional build settings, such as passing environment variables. Once all configurations are in place, proceed to the next step by clicking “Next.”
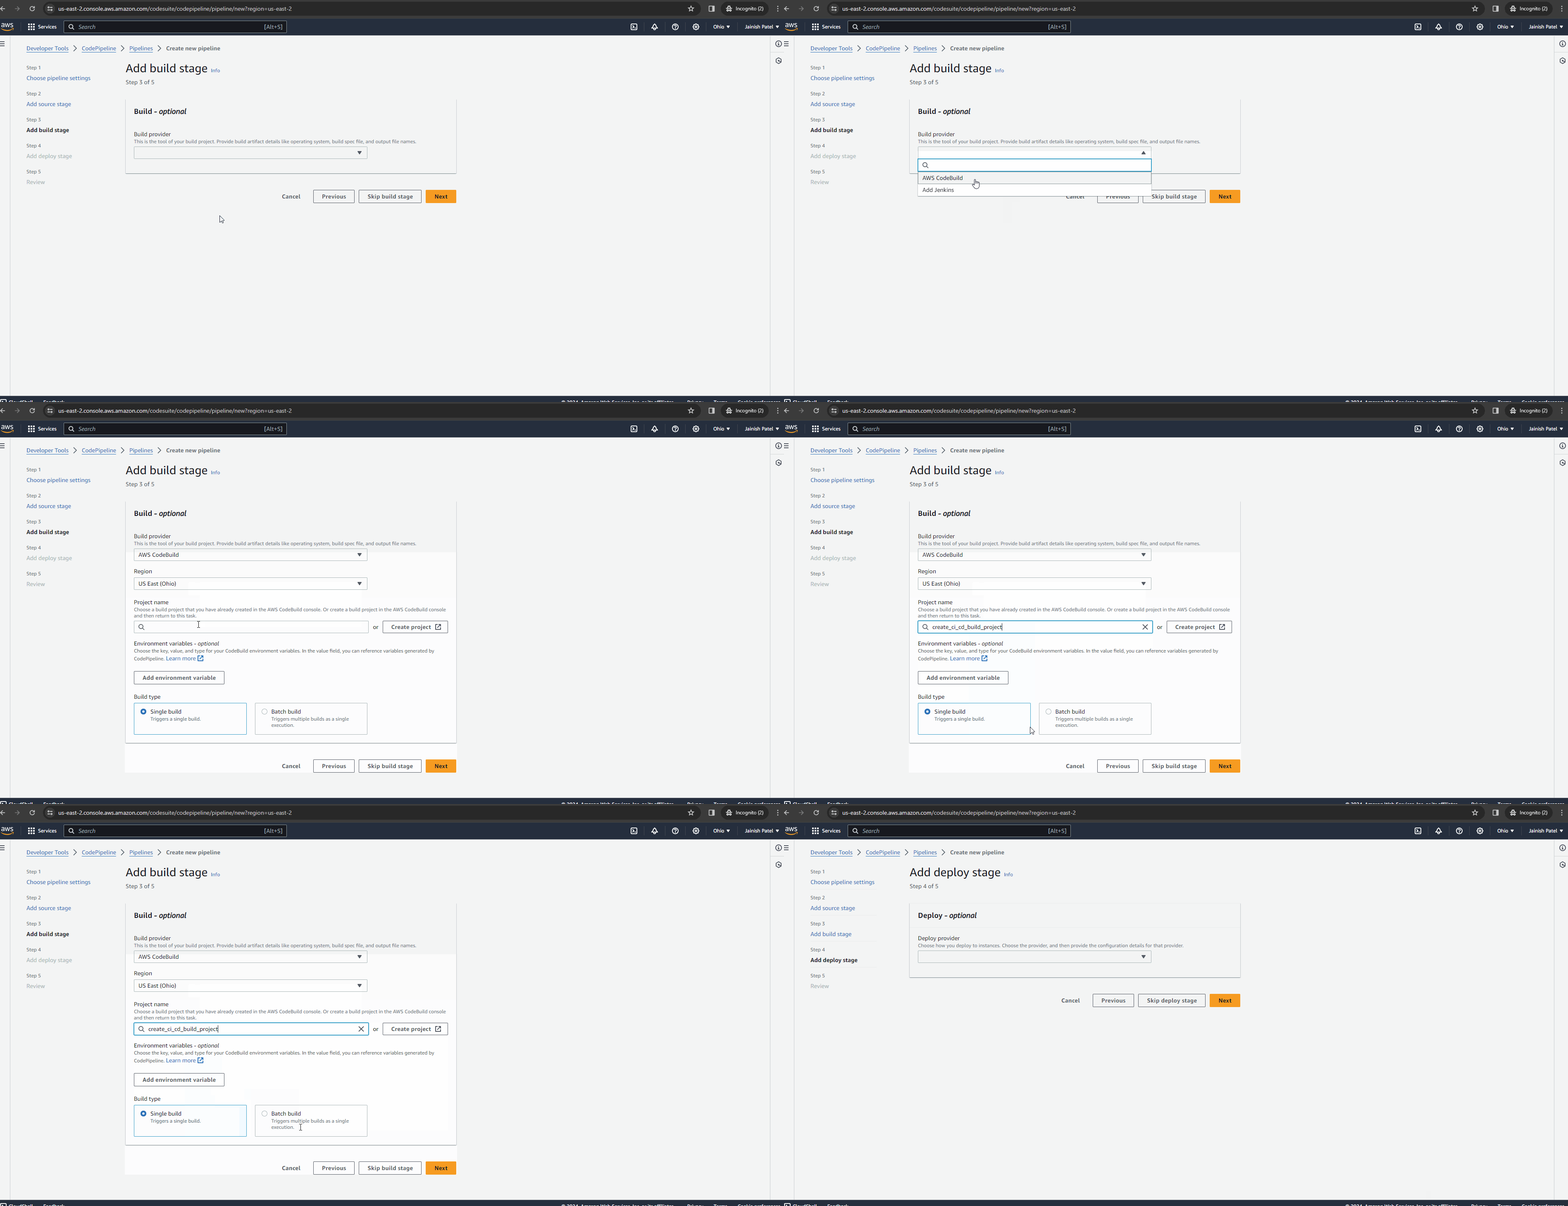
Step 5: The deployment stage is typically employed to execute deployments, creating AWS resources like EC2 instances, Lambda functions, VPCs, SNS, and more. However, in our current process, no resource deployment is required. To continue, simply click on “Skip deploy stage”.
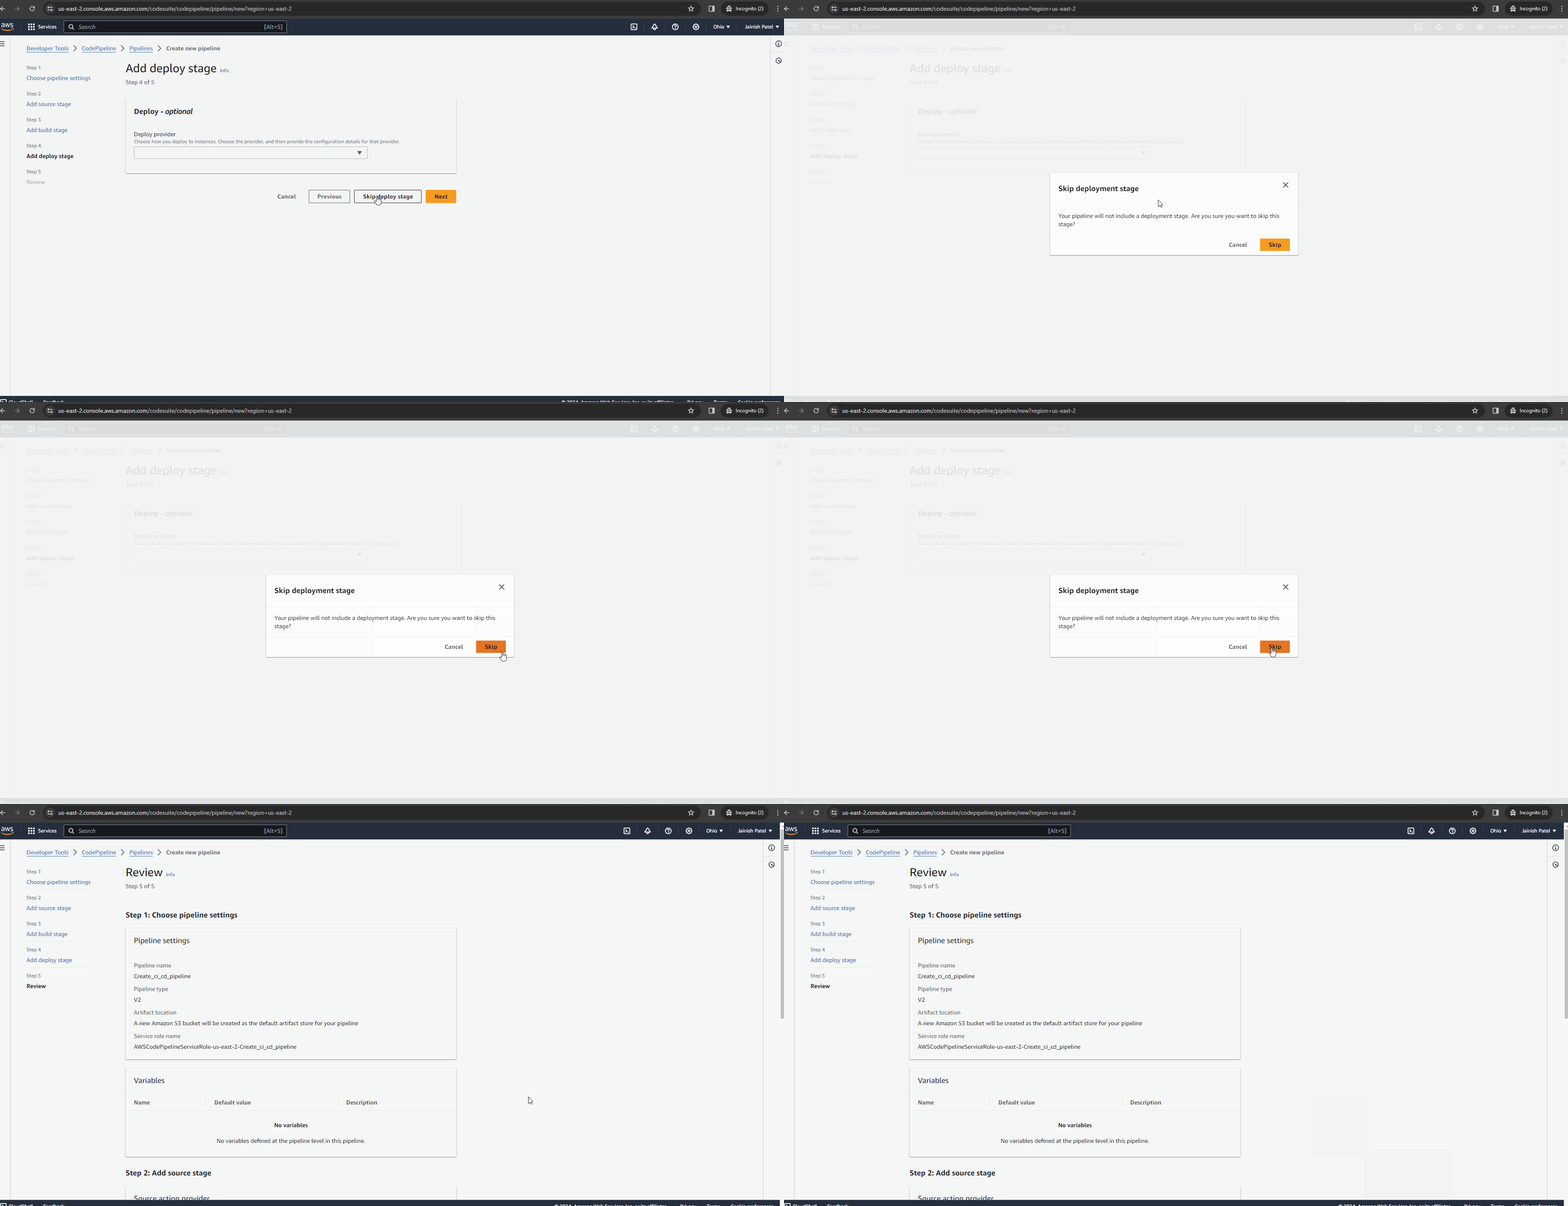
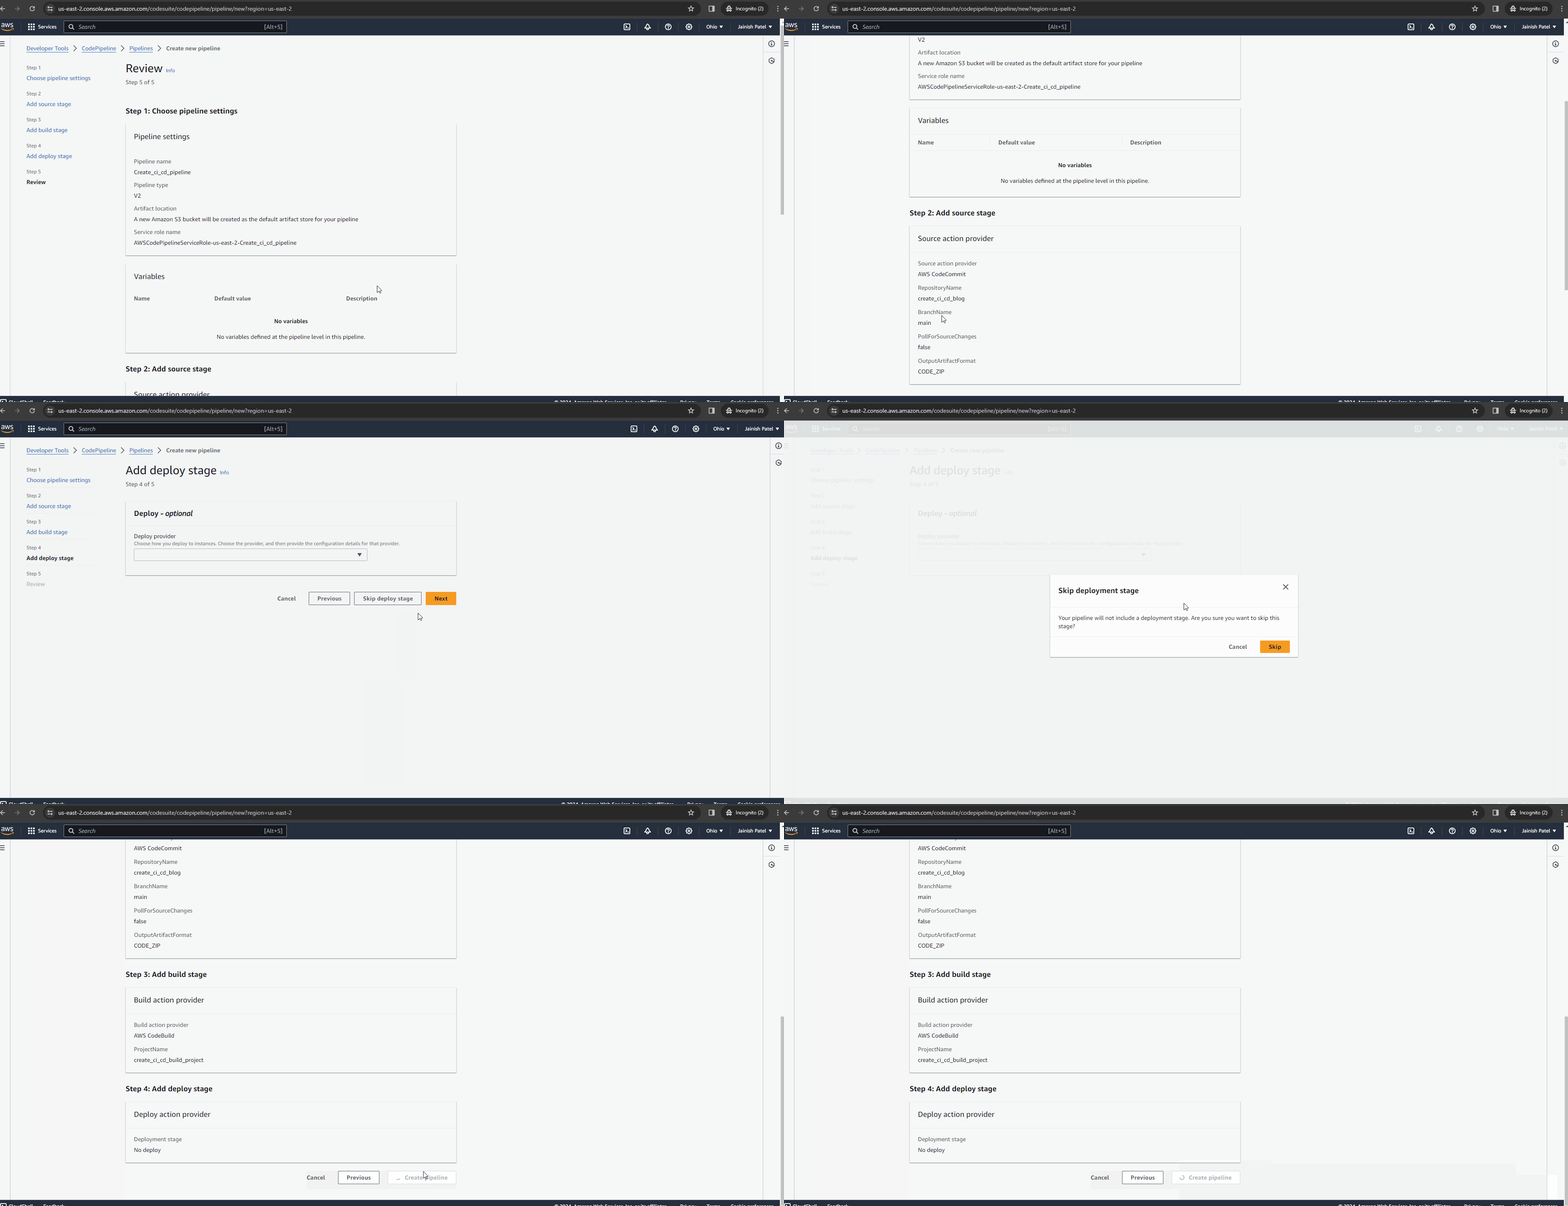
Step 6: On the review screen, carefully examine all the configurations previously set up. If you wish to make any adjustments to a specific stage, simply click the “Previous” button to navigate back and modify the configuration. Otherwise, proceed by clicking “Create pipeline” to finalize the pipeline creation process.
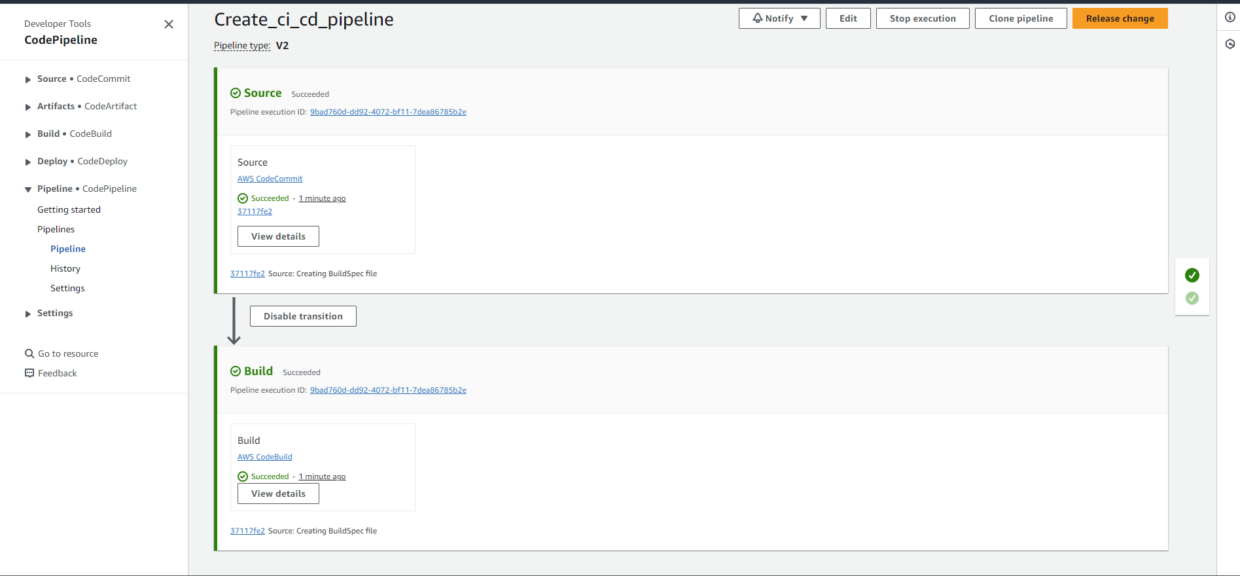
Upon creation, the pipeline initiates its inaugural execution automatically upon detecting changes in the designated CodeCommit repository. Going forward, your AWS CodePipeline is configured to trigger automatically whenever changes are identified in the specified CodeCommit repository. This ensures an automated and efficient CI/CD workflow for your AWS CodeCommit repository.
Congratulations!!! Upon completing this in-depth guide, you’ll not only grasp the fundamental principles of CodeCommit, CodeBuild, and CodePipeline but also gain practical expertise in constructing your AWS CI/CD pipeline like a seasoned expert. Prepare to enhance your development workflow and expedite your deployment processes.
TIP: If you are engaging in this for learning purposes, I recommend deleting all the resources created during this practical to prevent incurring AWS costs.
