Recent Posts
Archives
Domain Registration Made Easy: A Comprehensive AWS Guide
Introduction:
In today’s digital age, establishing a strong online presence starts with a compelling domain. Amazon Web Services (AWS) provides a seamless and efficient platform for domain registration. In this comprehensive guide, we will walk you through the step-by-step process of registering your domain on AWS. Follow along to unlock the full potential of your online identity.
Why Choose AWS for Domain Registration?
Before we dive into the registration process, let’s explore why AWS is a top choice for domain registration:
- Reliability: AWS is known for its robust infrastructure, ensuring your domain is accessible 24/7.
- Scalability: As your online presence grows, AWS can easily scale to meet your increasing demands.
- Security: With AWS, your domain is backed by industry-leading security measures, keeping your data safe.
- Ease of Integration: AWS seamlessly integrates with other services, simplifying the management of your online assets.
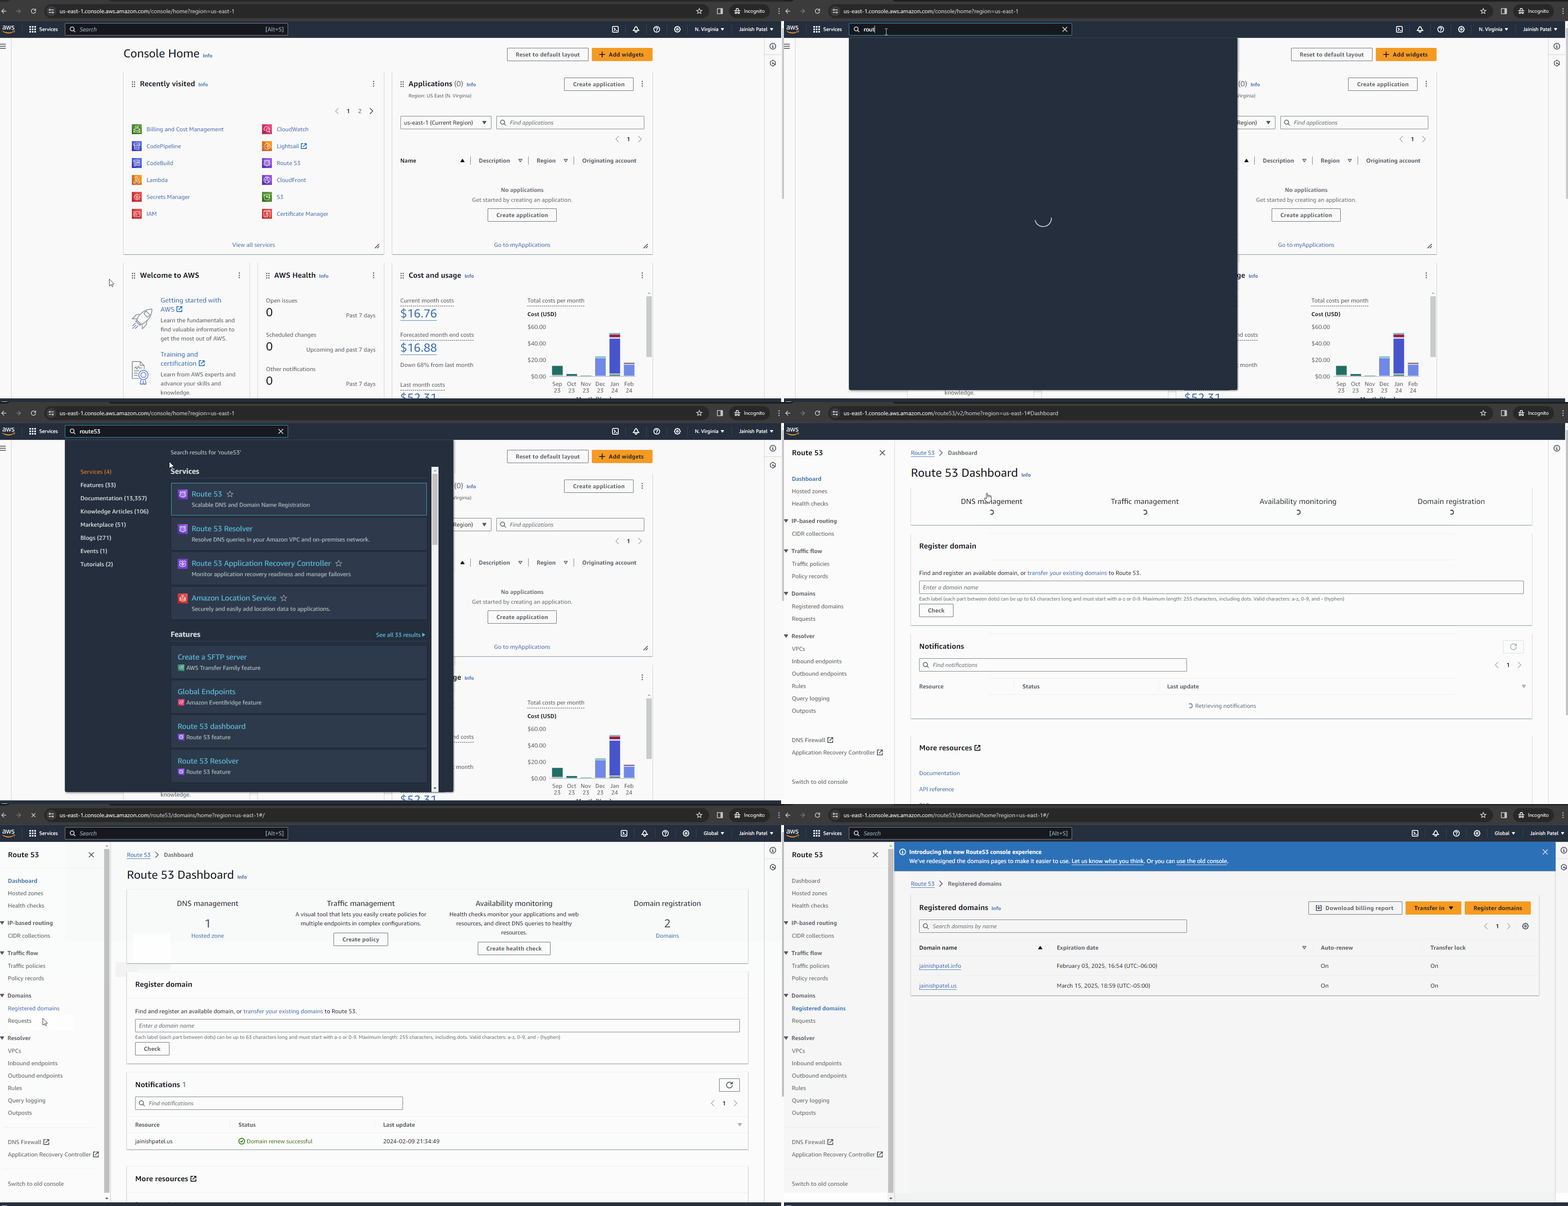
Step 1: Head over to the AWS Management Console and log in to your AWS account. If you don’t have an account yet, you can effortlessly create one by following the simple account creation process provided here.
Step 2: Navigate to the AWS Management Console and access the Route 53 service. Route 53 is specifically designed for domain registration, DNS management, and more. Click on the “Registered domains” tab or “Register Domain” button to kickstart the domain registration process.

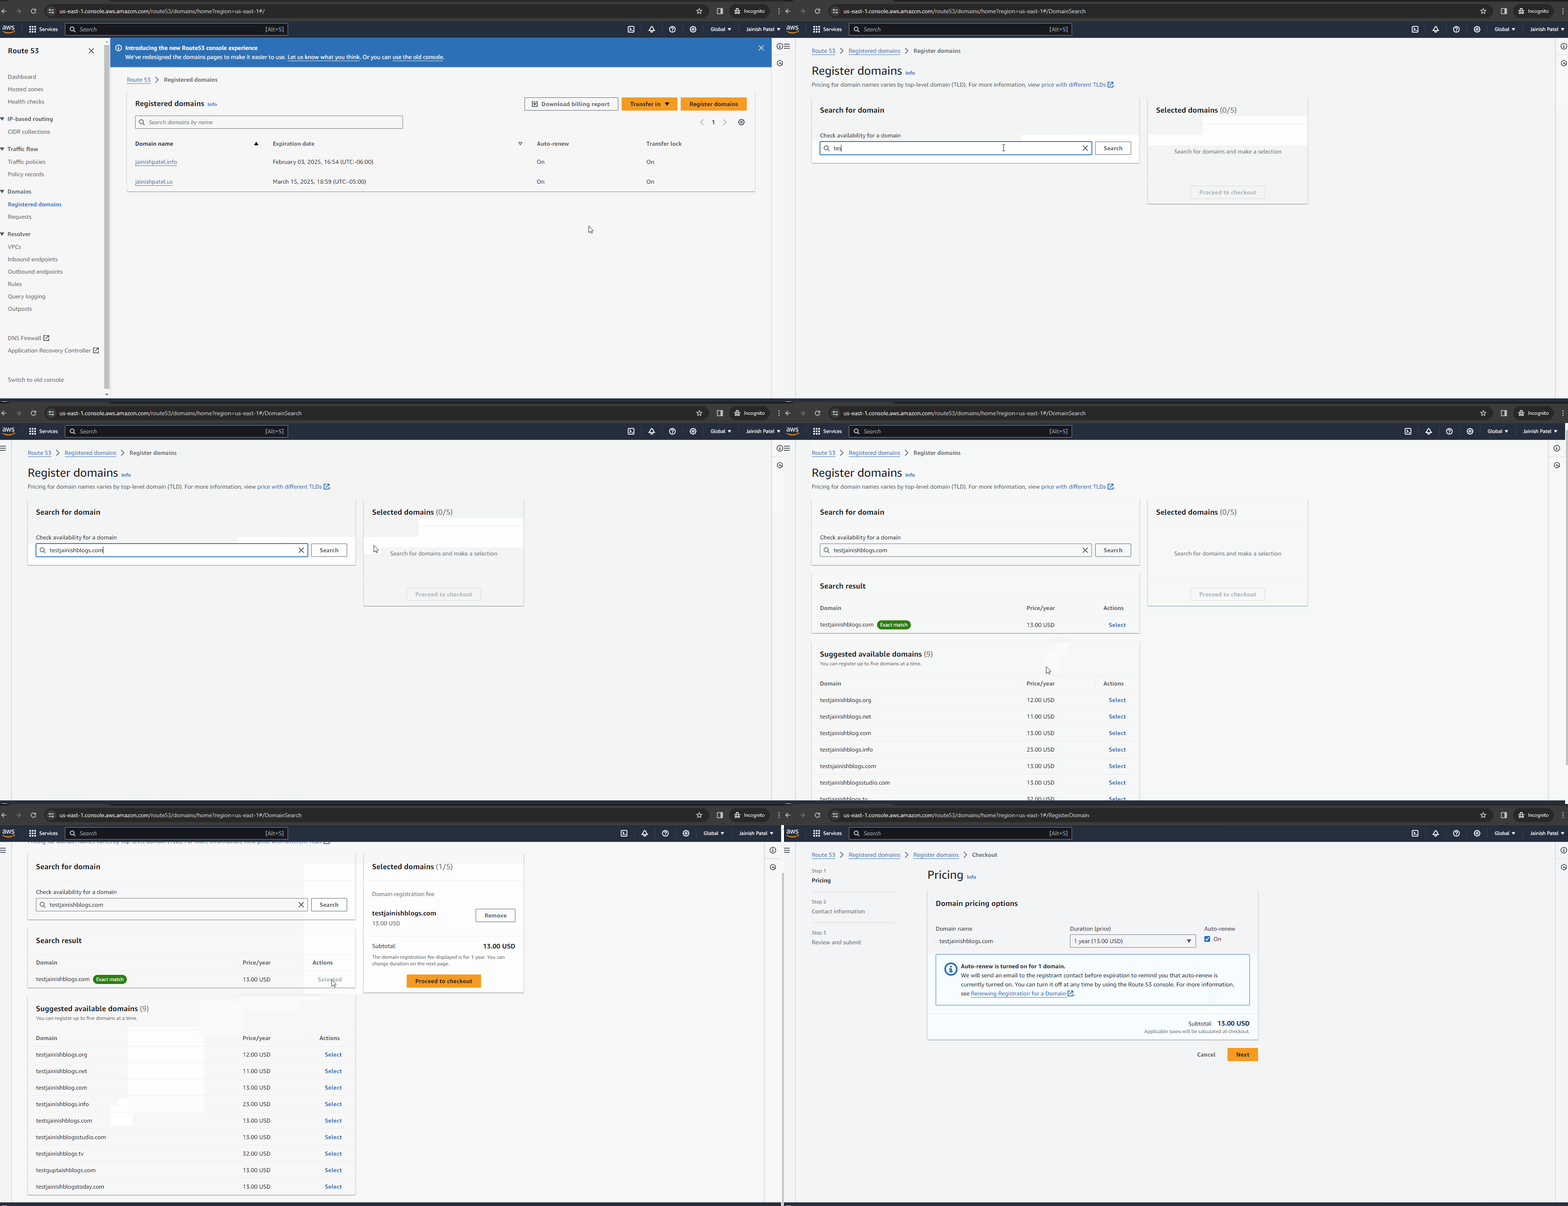
Step 3: Opt for “Register Domains” and input your preferred domain name. Utilize the “Search” button to verify the availability of your chosen domain and explore additional domain options along with their corresponding prices. Once you’ve made a decision on the domain you wish to acquire, click on “Select,” followed by “Proceed to checkout” to complete the purchase.
TIP: You can register up to 5 domains at once. AWS offers a diverse range of domains; you can find a list of available domains and their prices here.

Step 4: Tailor your domain settings to suit your preferences, covering aspects like the registration duration, privacy protection, and DNS configuration. AWS provides the flexibility to personalize these settings based on your requirements, allowing for variations such as providing distinct contact information for administrative, technical, and other purposes.
TIP: Initially, you can acquire the domain for a maximum period of 10 years, with the option to renew beyond this timeframe.

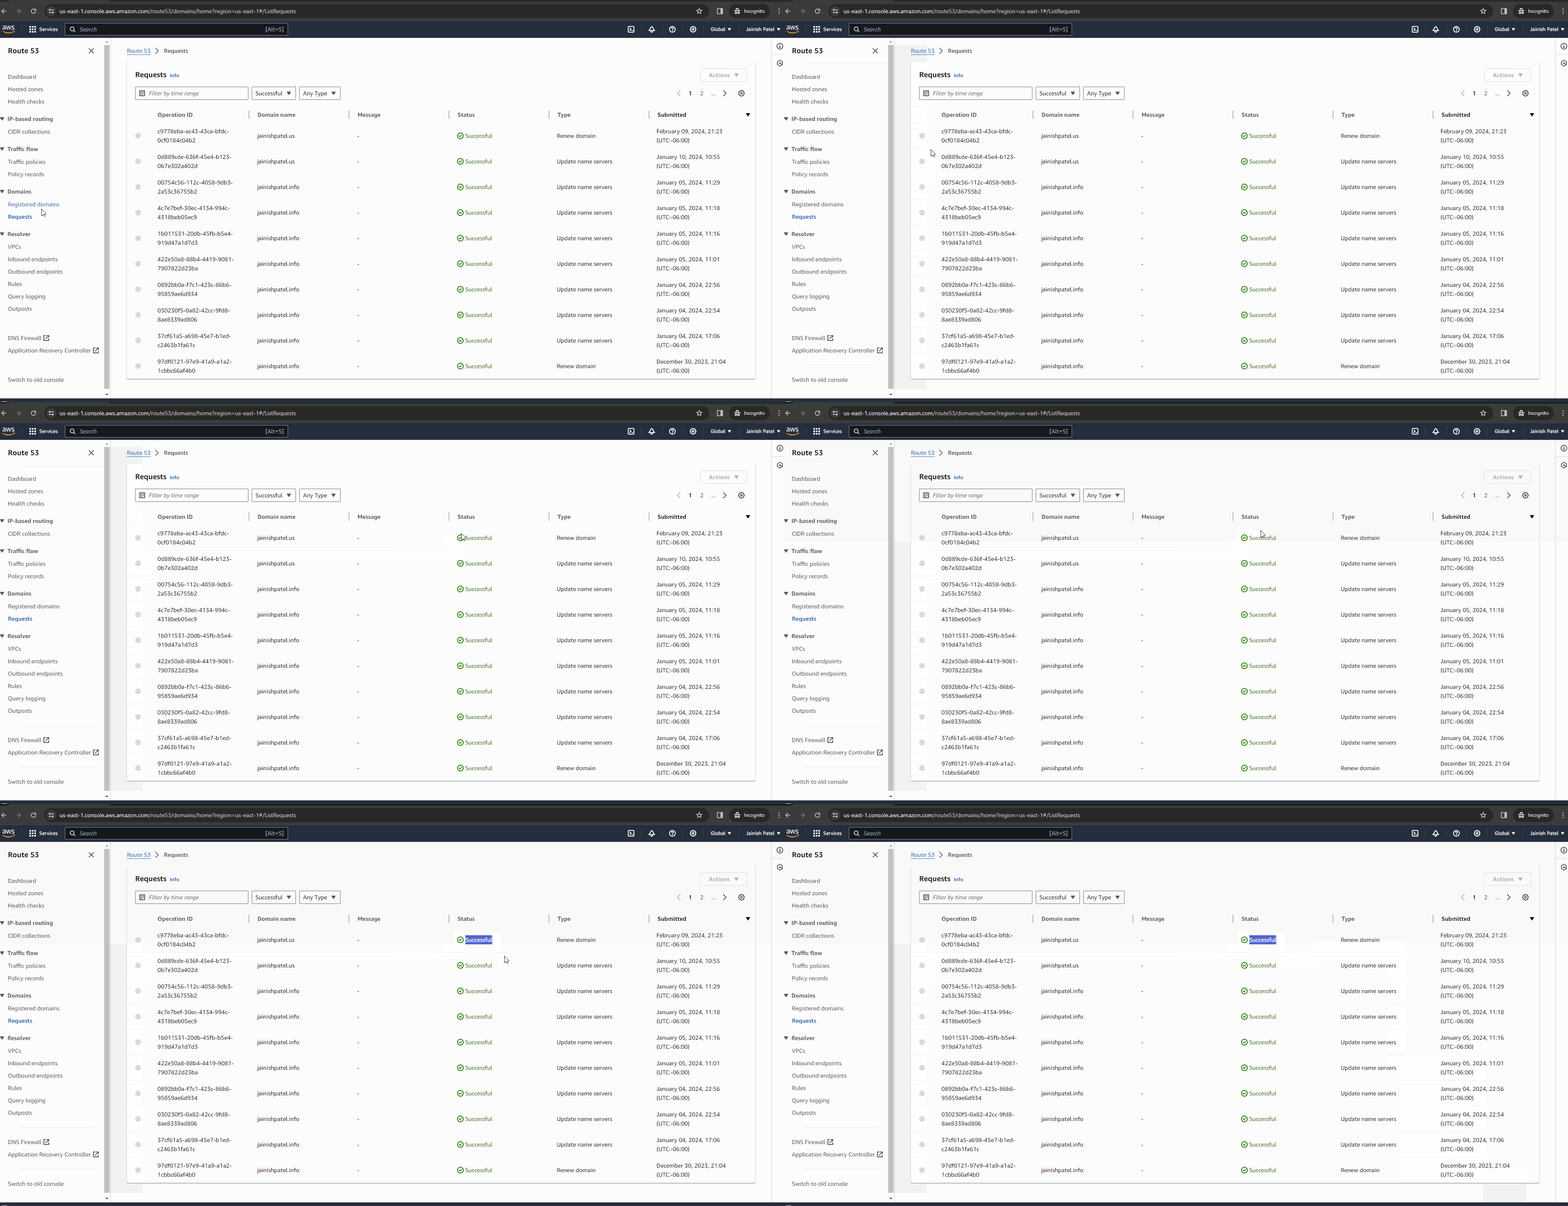
Step 5: Carefully examine the details of your domain registration and make any required adjustments. Upon ensuring everything meets your satisfaction, advance to the confirmation step by agreeing to the terms and policy, and then clicking the “Submit” button. In certain instances, AWS may prompt you to confirm the payment or provide payment details. Simply follow the steps, and you’ll observe that your domain purchase request has been successfully submitted.

Pro Tip: While domain purchase requests typically take around 10-15 minutes, there are instances where it might take longer. If you encounter any errors during the process, it is advisable to create a support case with AWS for a thorough investigation.
Congratulations! You’ve successfully registered your domain with AWS. Now, if you’re wondering what to do next, consider hosting a static website on your newly acquired domain. Check out our detailed guide on How to Host a Static Website in AWS for a step-by-step walkthrough.
Hosting a static website in AWS is the perfect way to showcase your content to the world. Stay tuned for more AWS-related guides and make the most of your cloud journey.
